Deploy SynxDB Cloud on AWS via Omnistrate
This guide walks a customer’s database administrator (DBA) through deploying SynxDB Cloud on Amazon Web Services (AWS) using the Omnistrate platform. You subscribe through AWS Marketplace, connect your AWS account, deploy the service, and hand off access to your database users.
Prerequisites
An active AWS account with administrative privileges. Deployment creates roles and infrastructure via CloudFormation, which requires admin rights.
Access to AWS Marketplace to subscribe.
During deployment, the following AWS services are used. Bookmark them for easy monitoring:
RDS (Relational Database Service)
S3 (Simple Storage Service)
EKS (Elastic Kubernetes Service)
EC2 (Elastic Compute Cloud)
CloudFormation
IAM
Step 1. Subscribe via AWS Marketplace
Subscribe to SynxDB Cloud BYOC through AWS Marketplace. Billing is handled by AWS, so no separate payment is required in the Customer Portal.
Step 2. Open the Customer Portal
After subscribing, open the Customer Portal through the AWS access portal by selecting the SynxDB Cloud application.
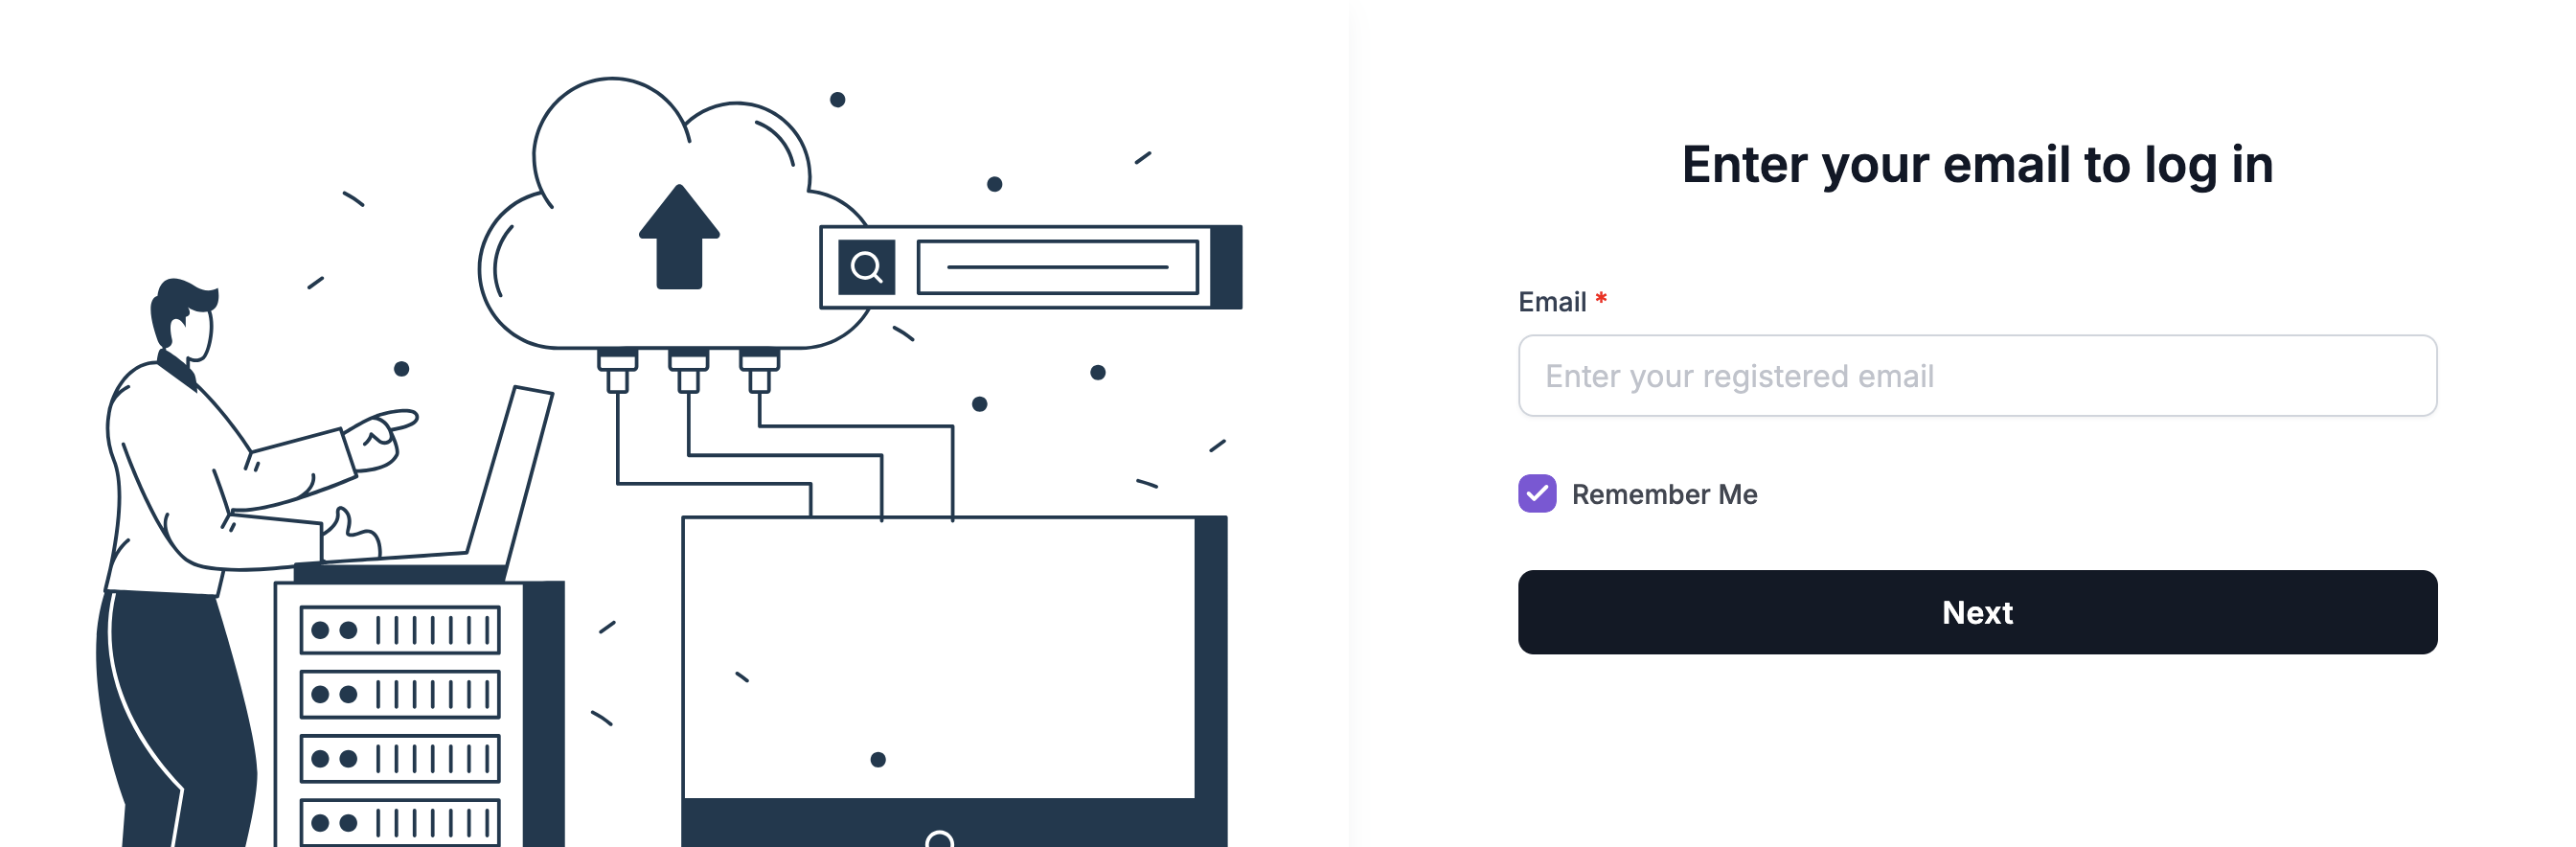
When prompted, enter your registered email and click Next to log in.
Step 3. Connect your AWS account
Authorize Omnistrate to provision resources in your AWS account.
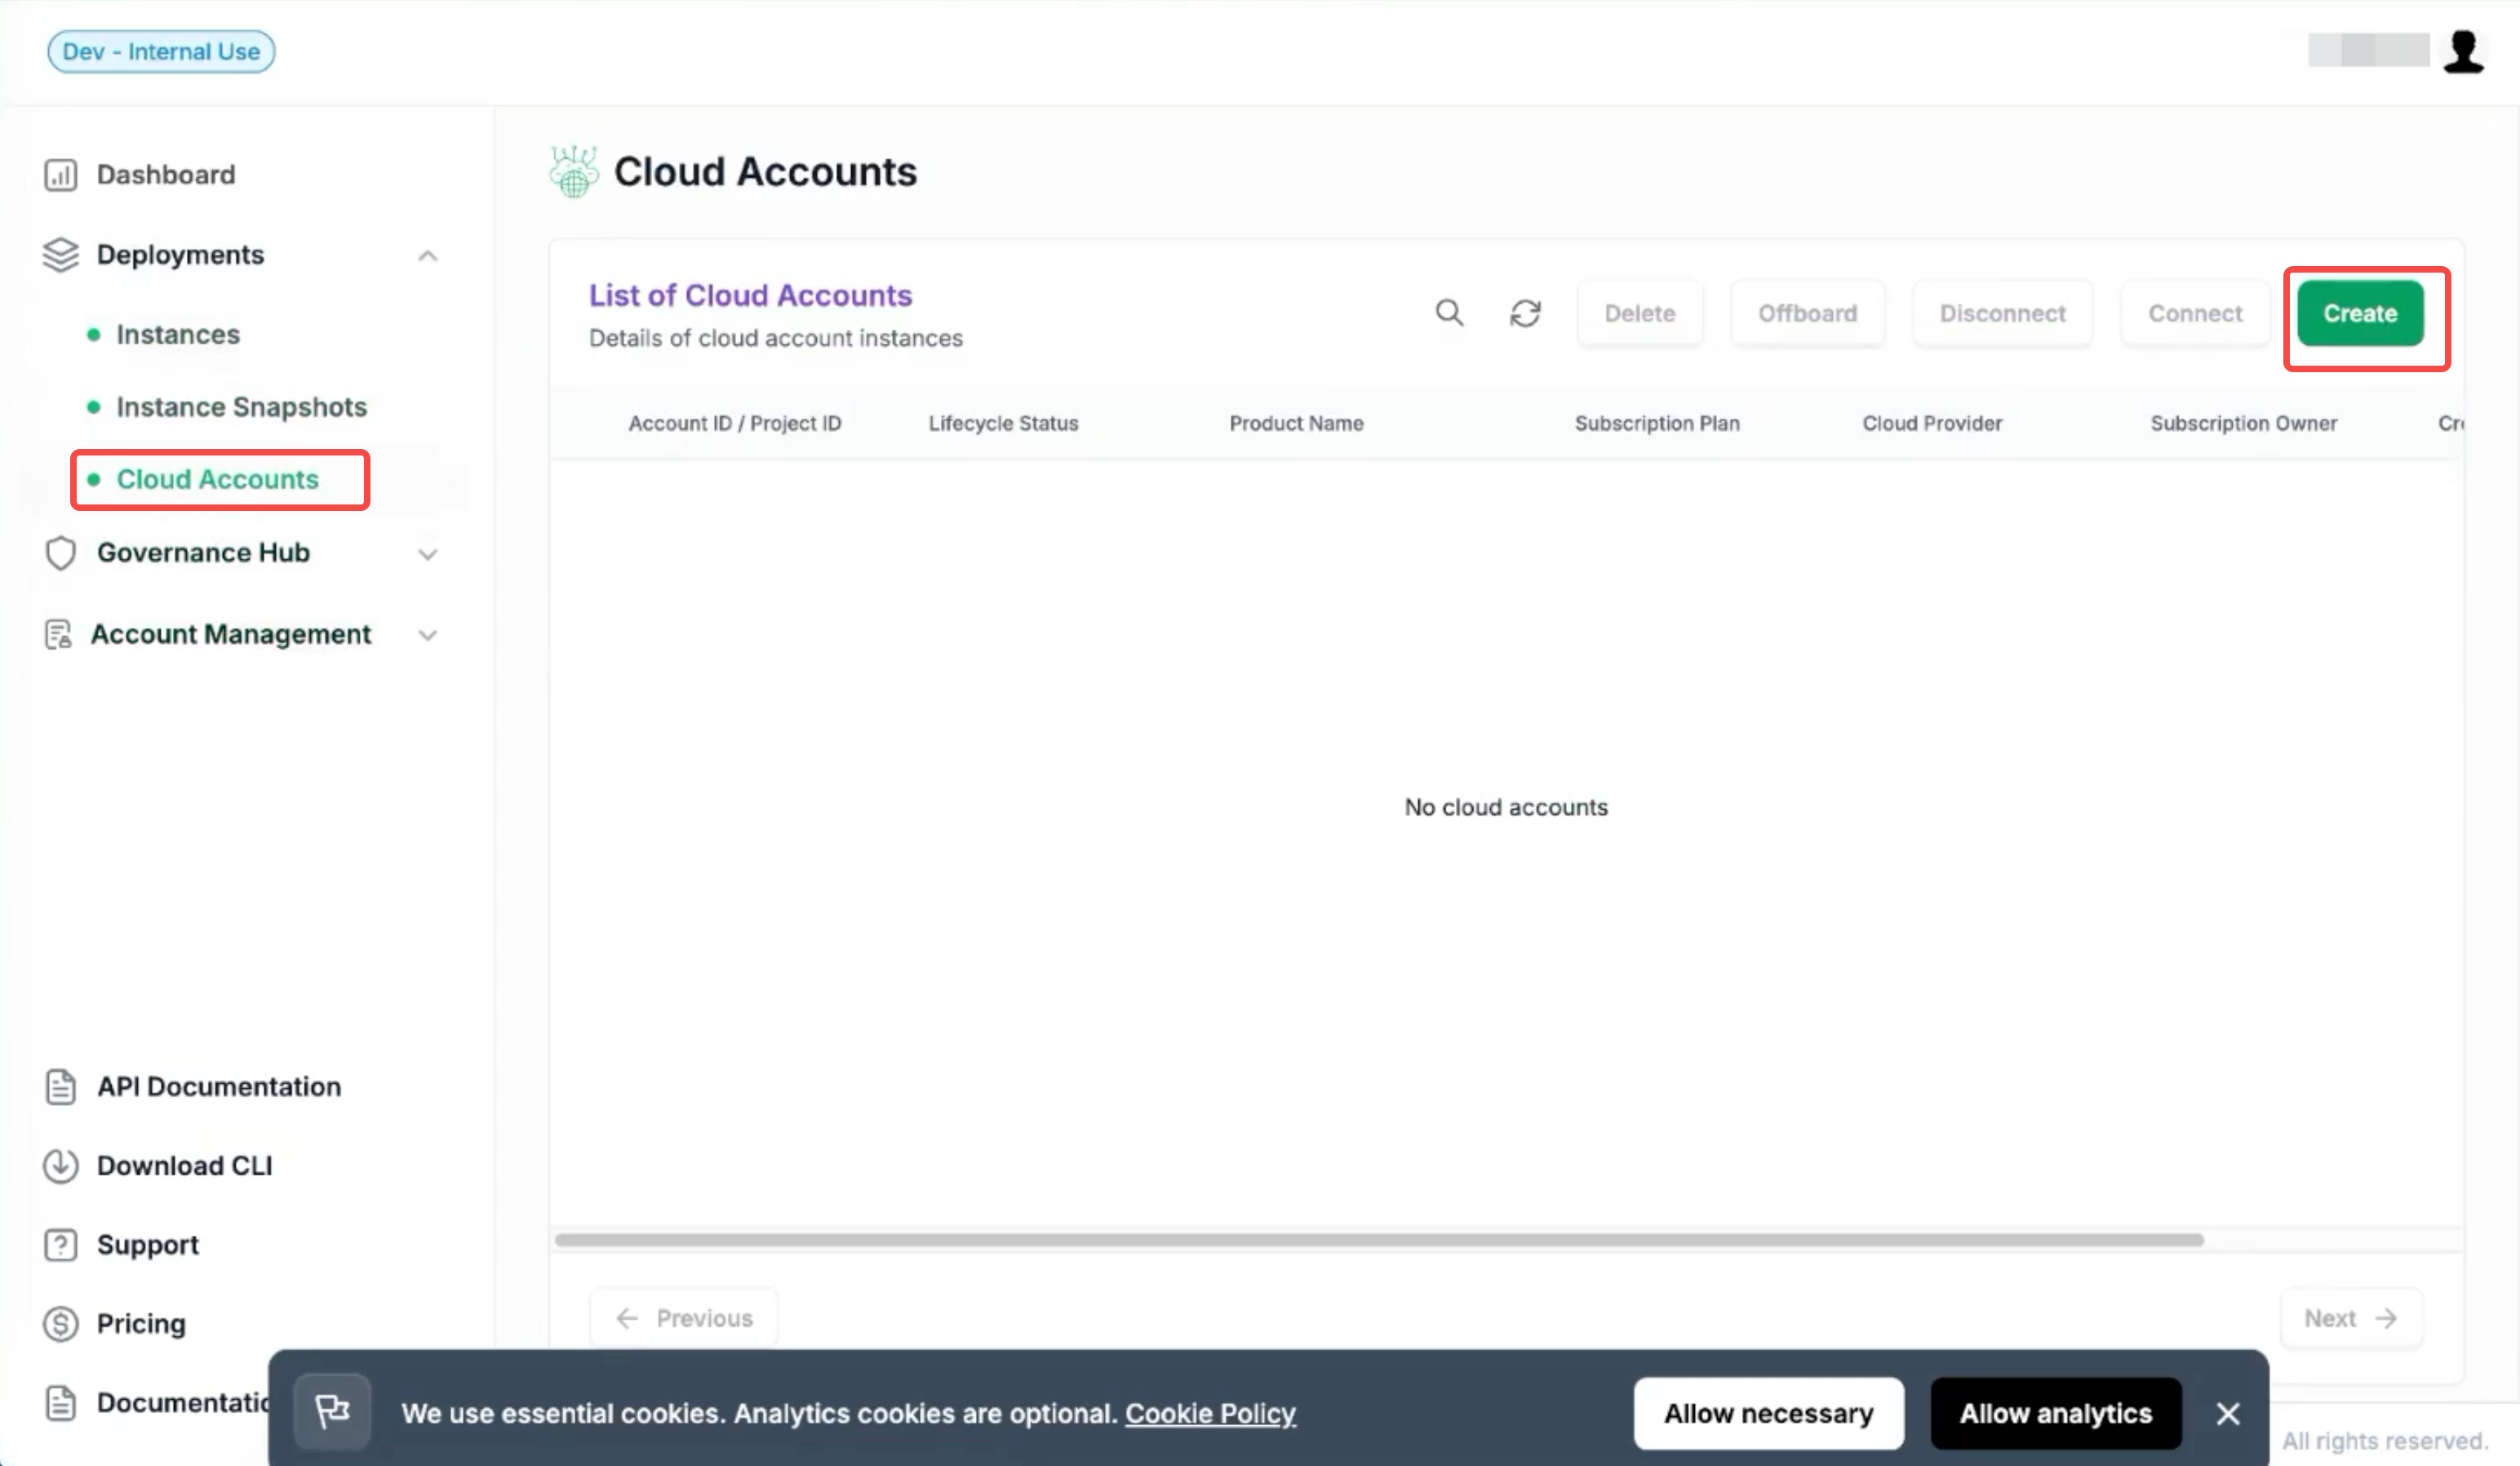
In the Customer Portal, go to Deployments > Cloud Accounts.
Click Create in the top-right corner. The Create Account page opens.
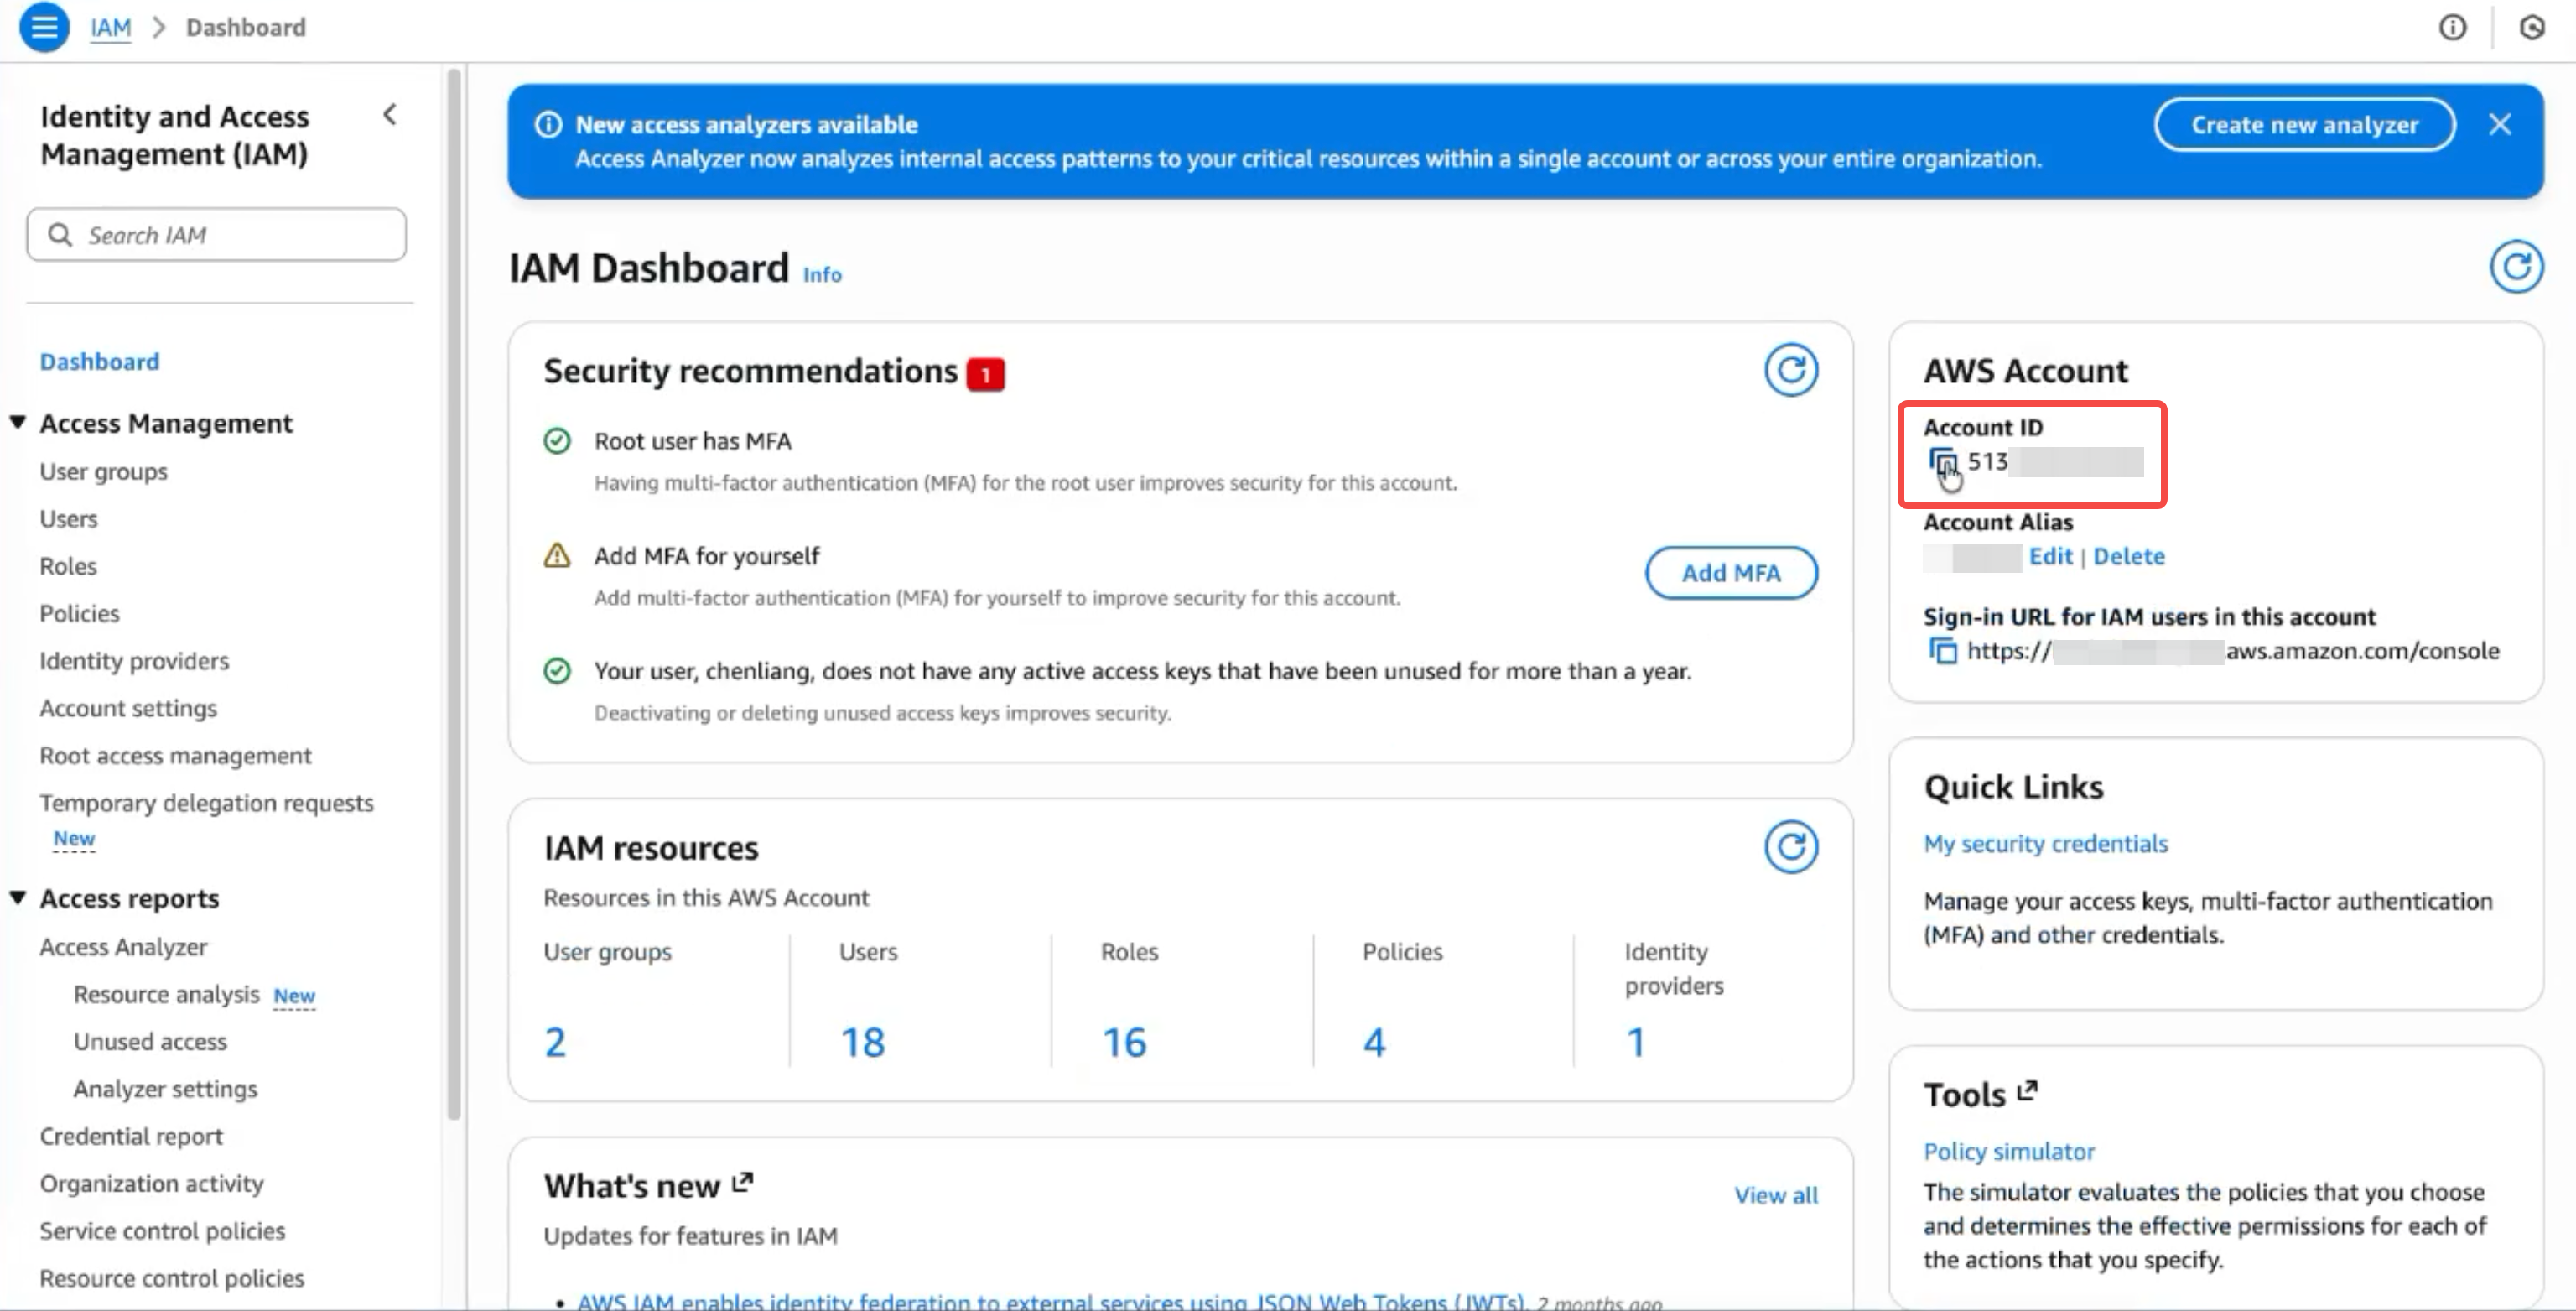
Enter your Enterprise AWS Account ID. You can find this ID in the IAM section of your AWS console.
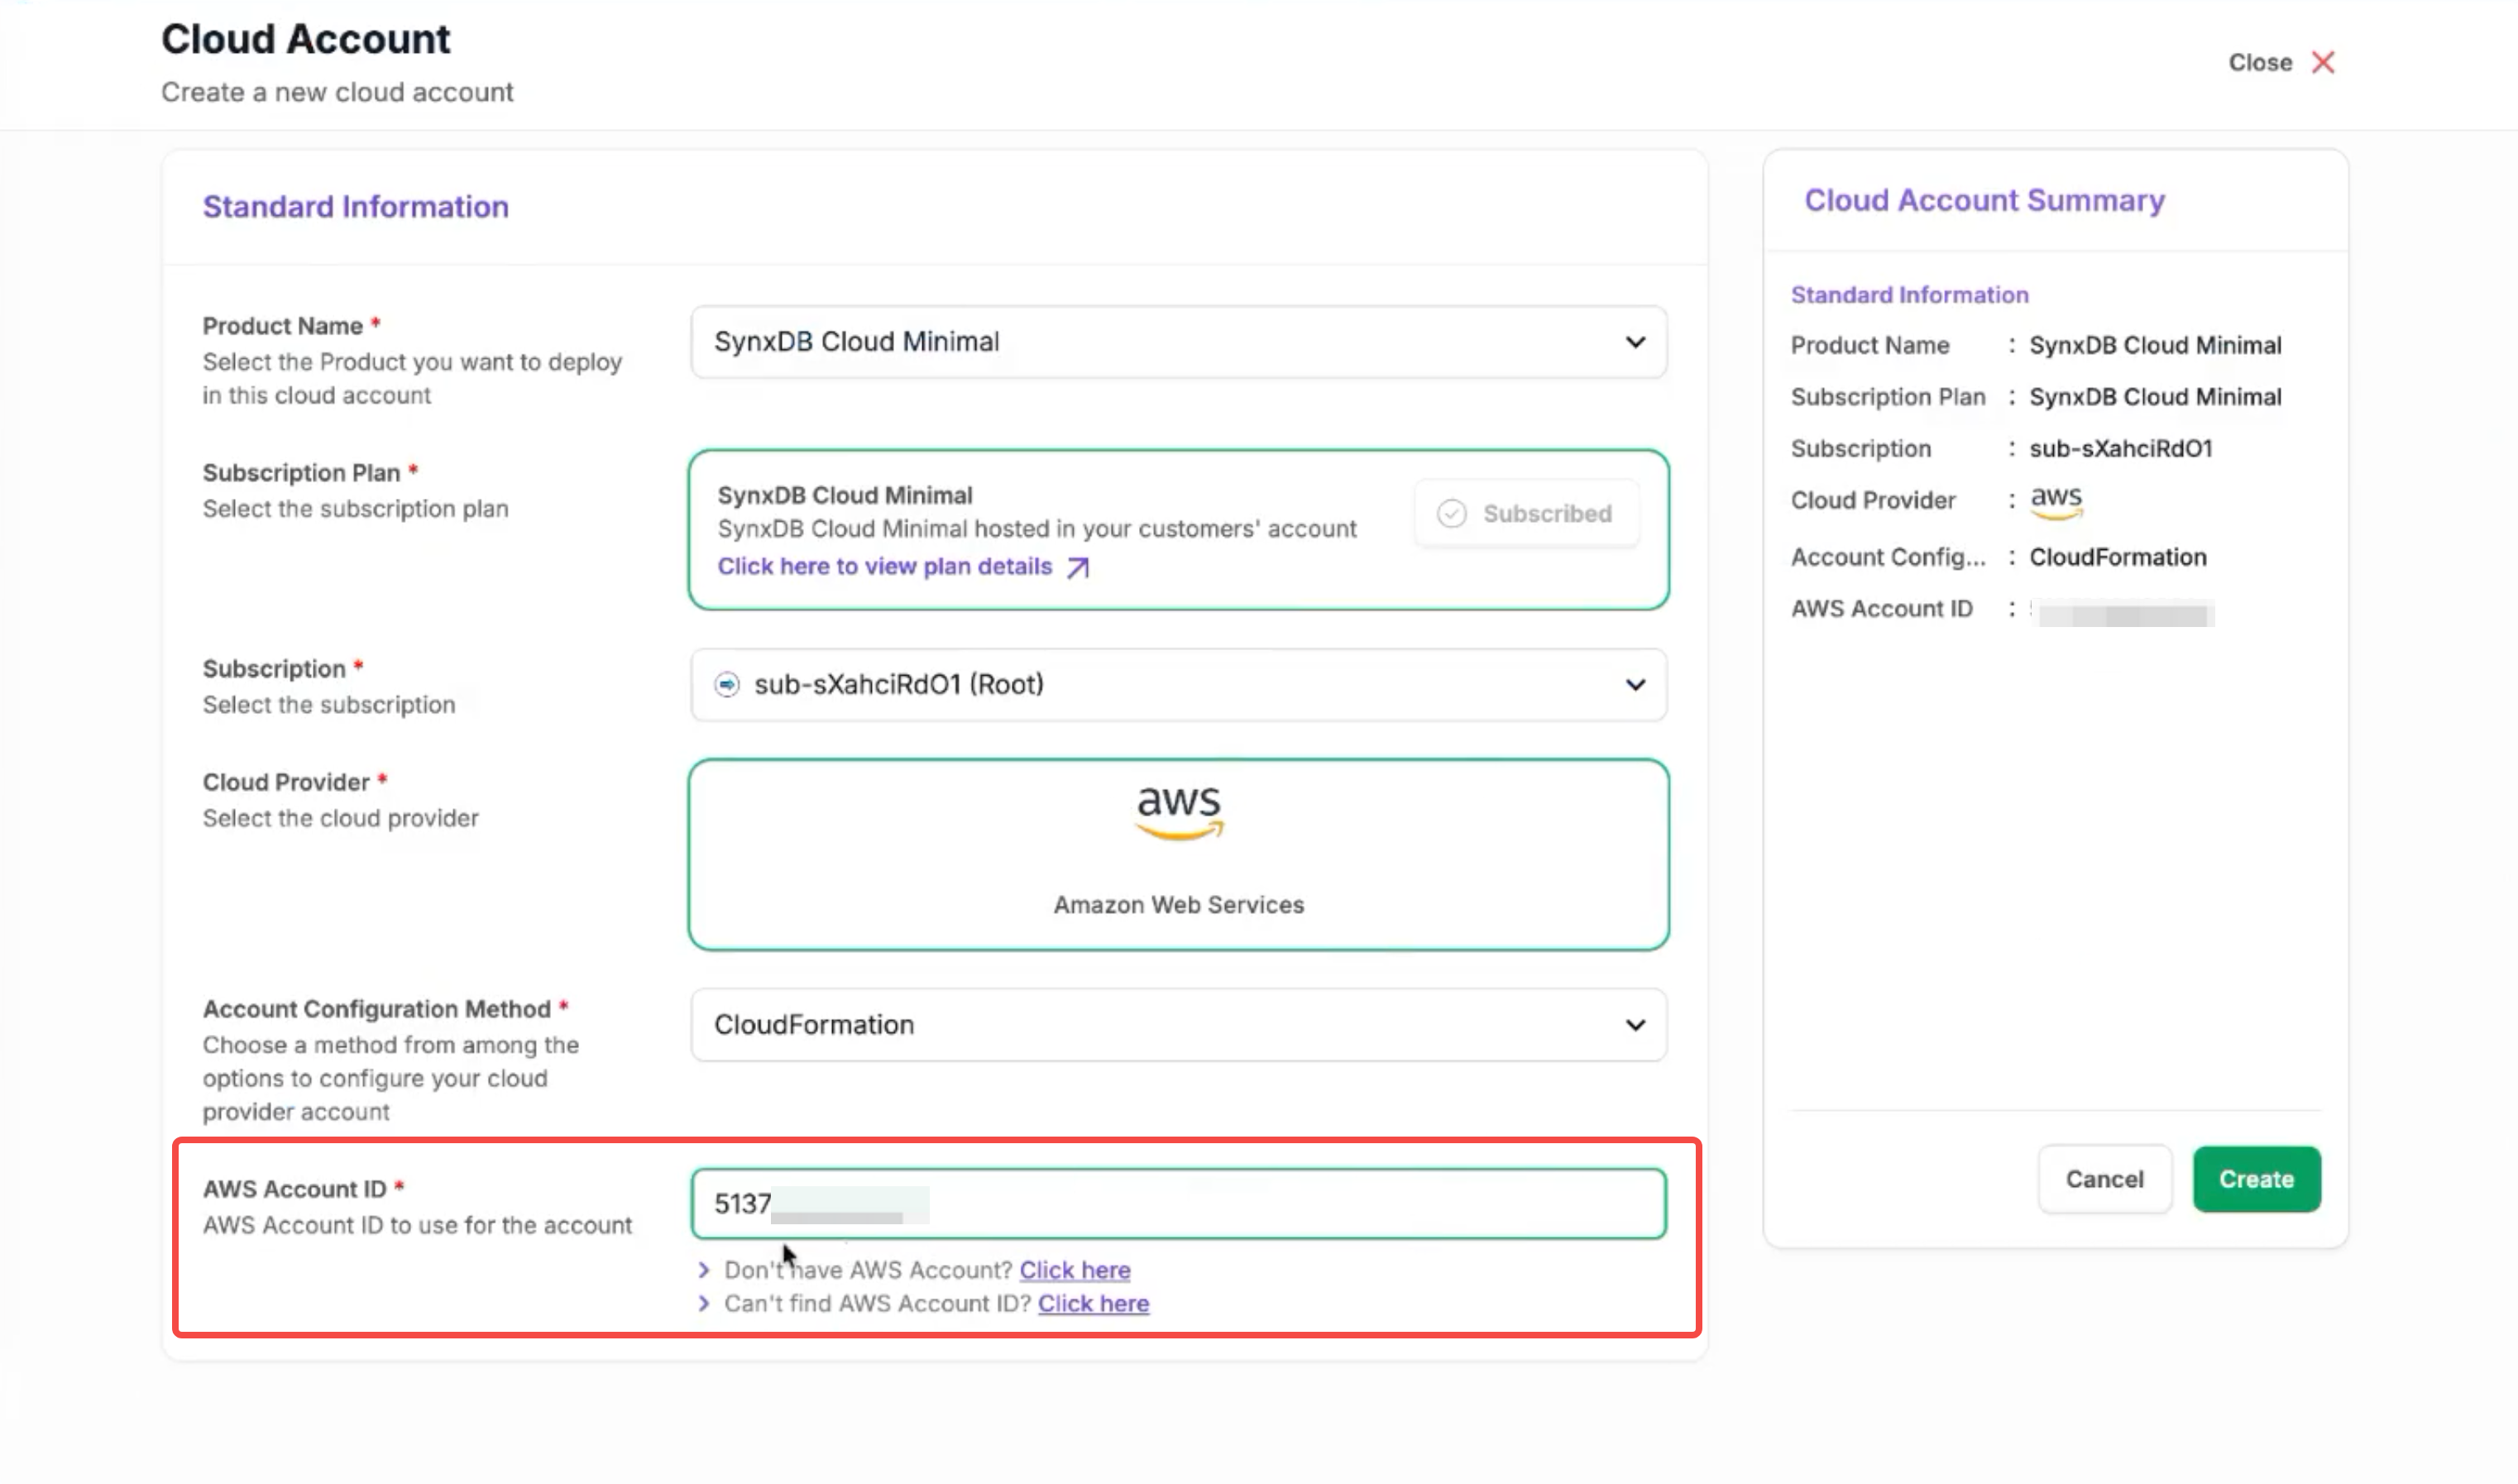
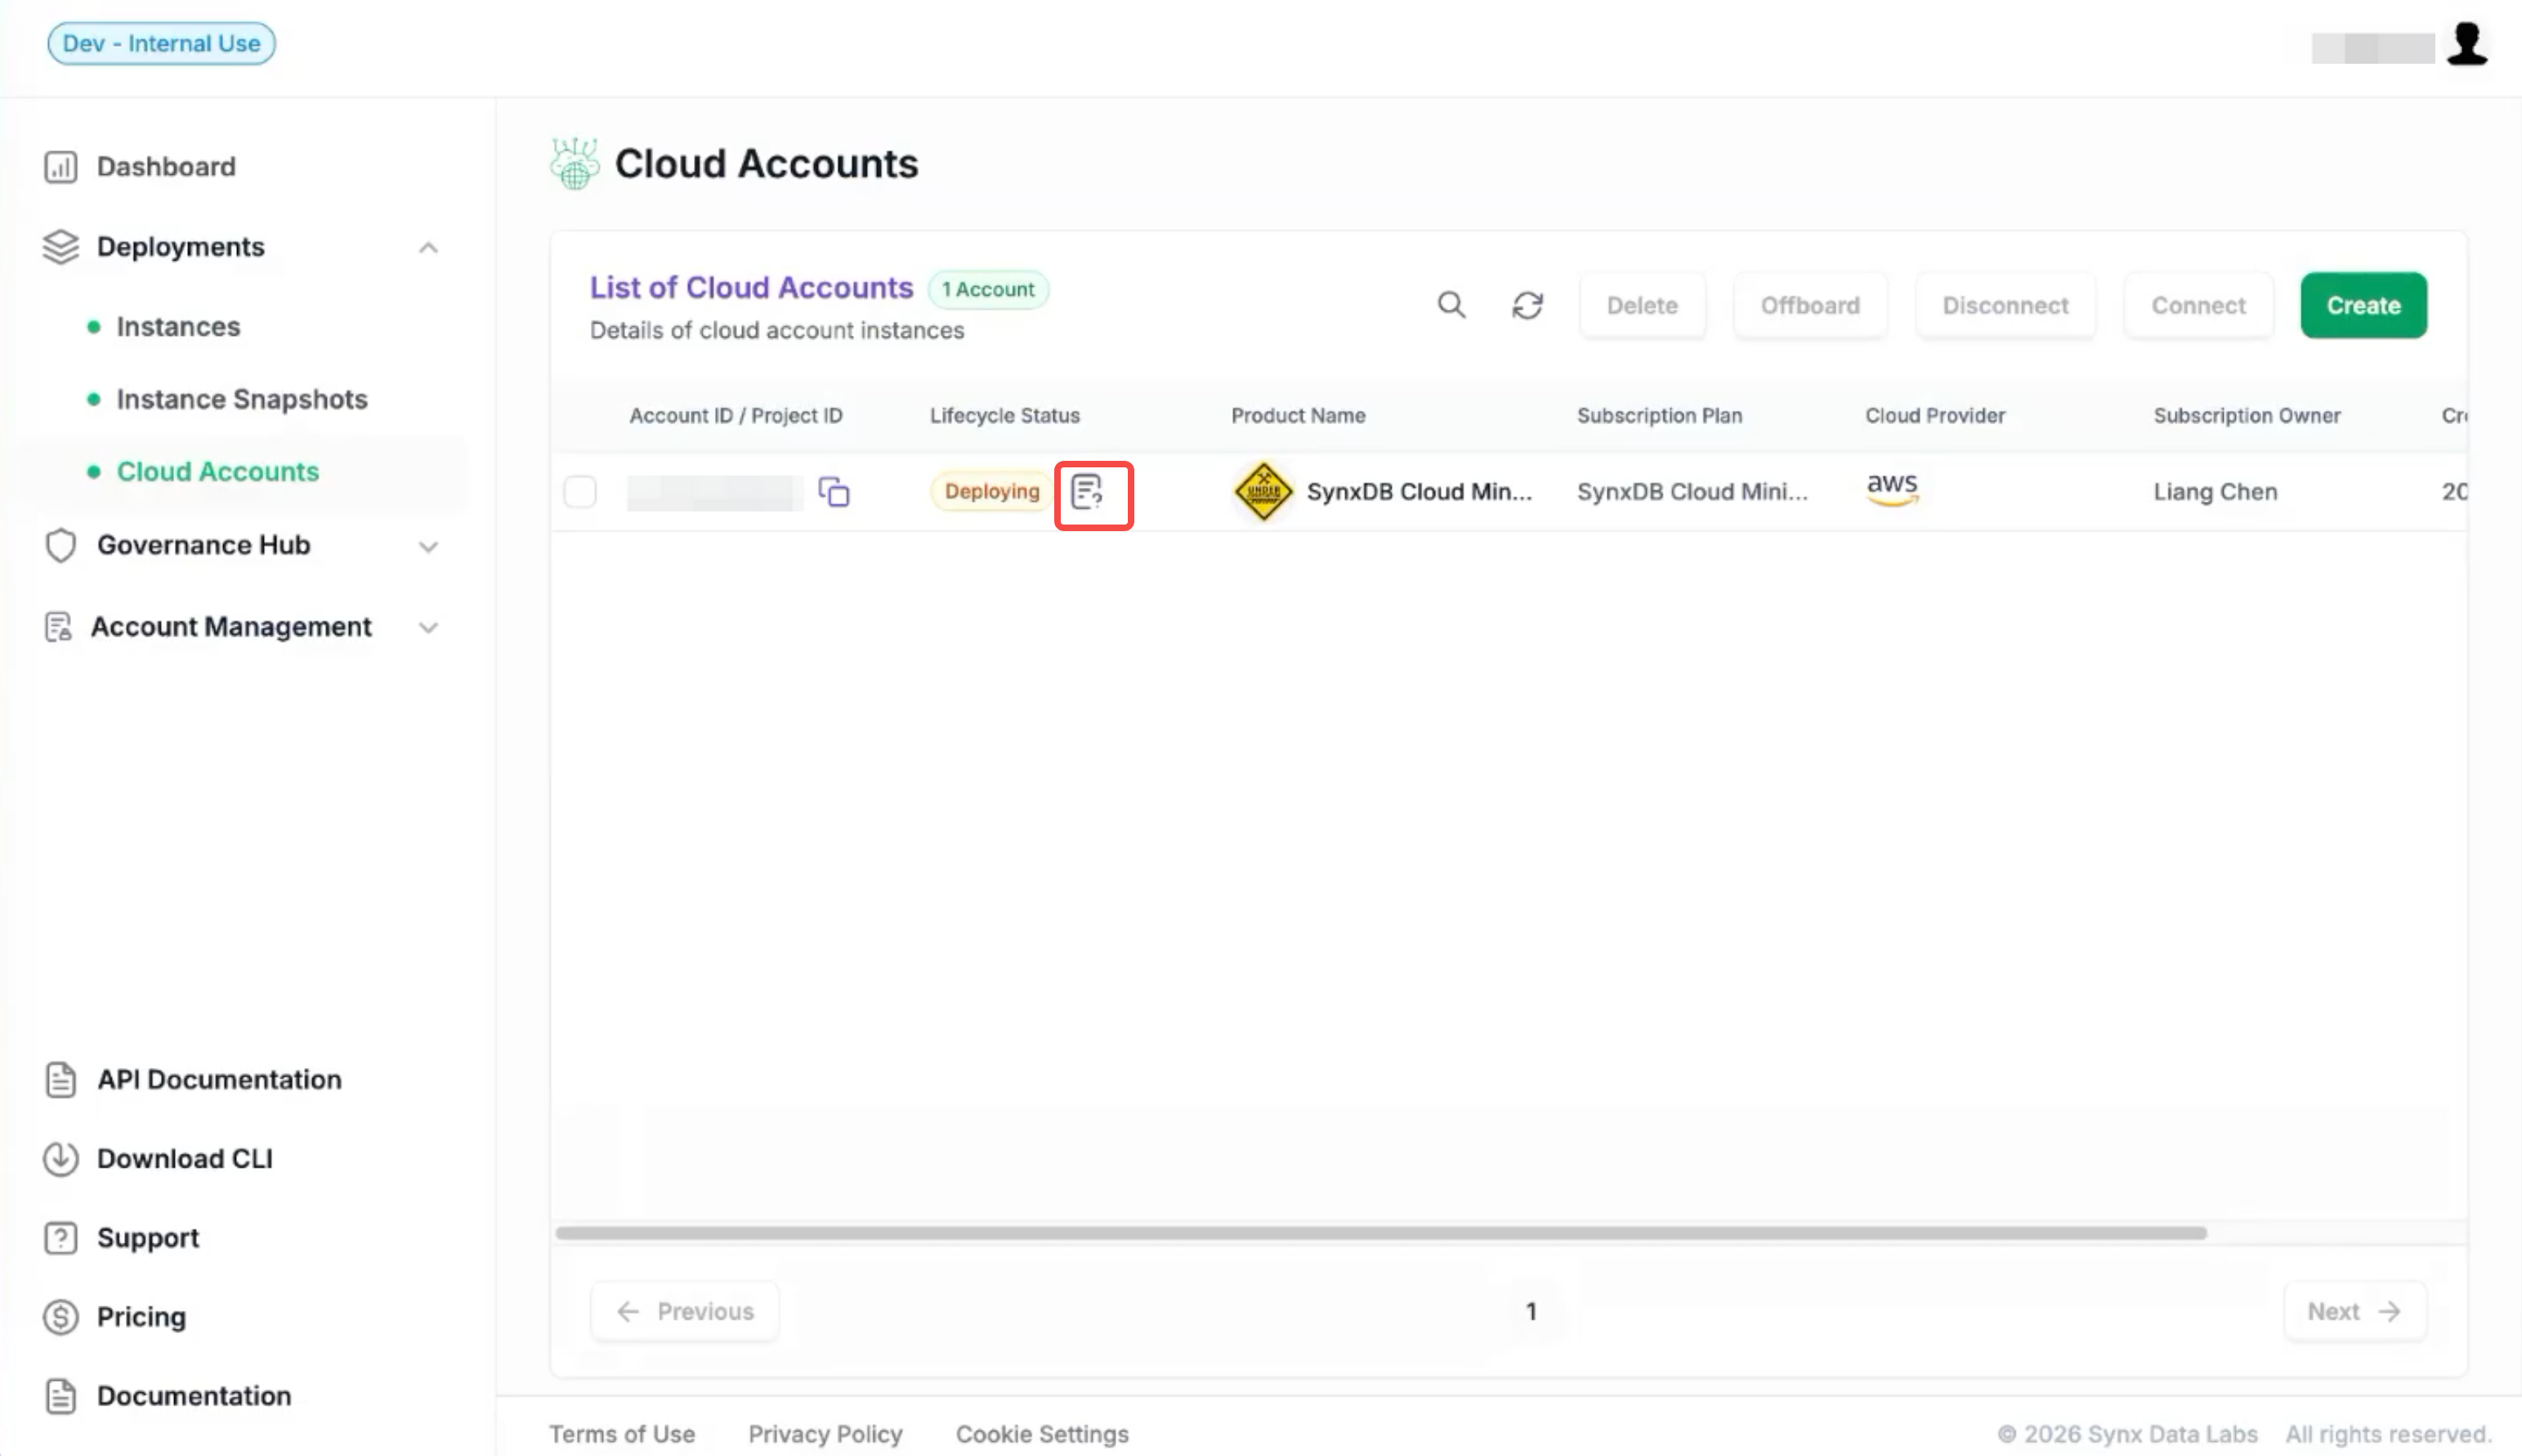
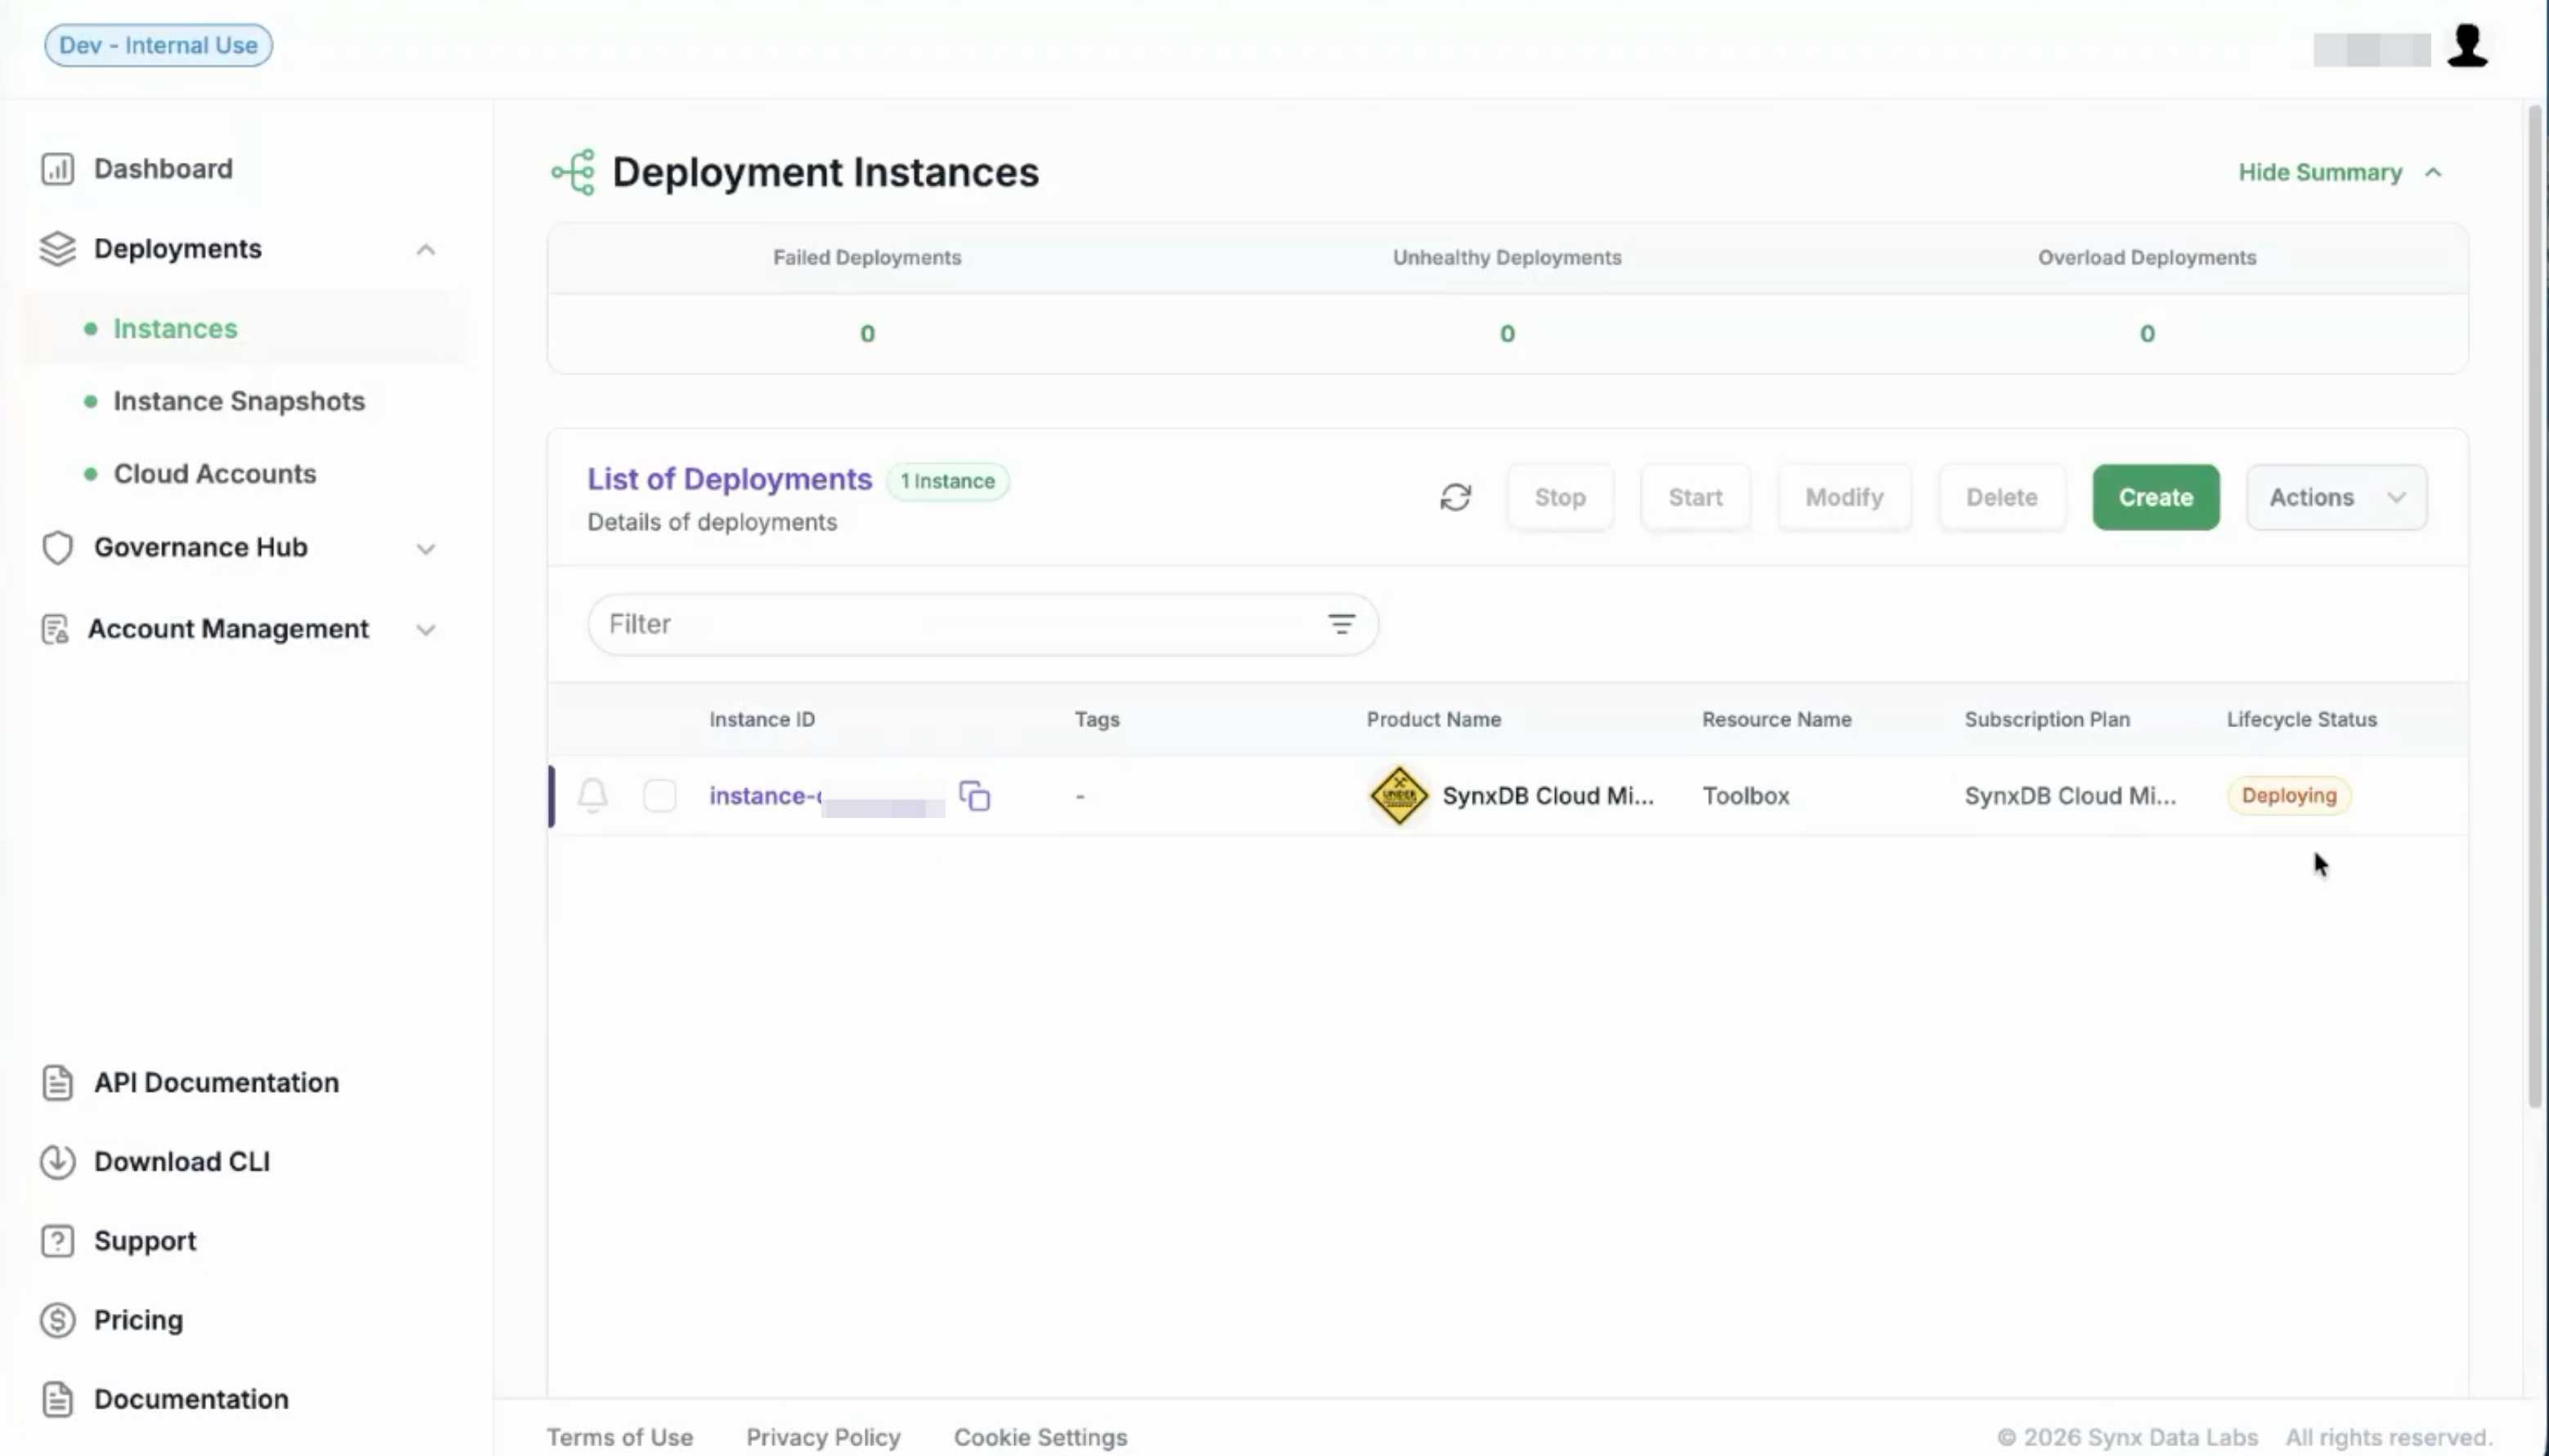
Click Create. The Cloud Account appears in the Cloud Accounts list with a Deploying status.
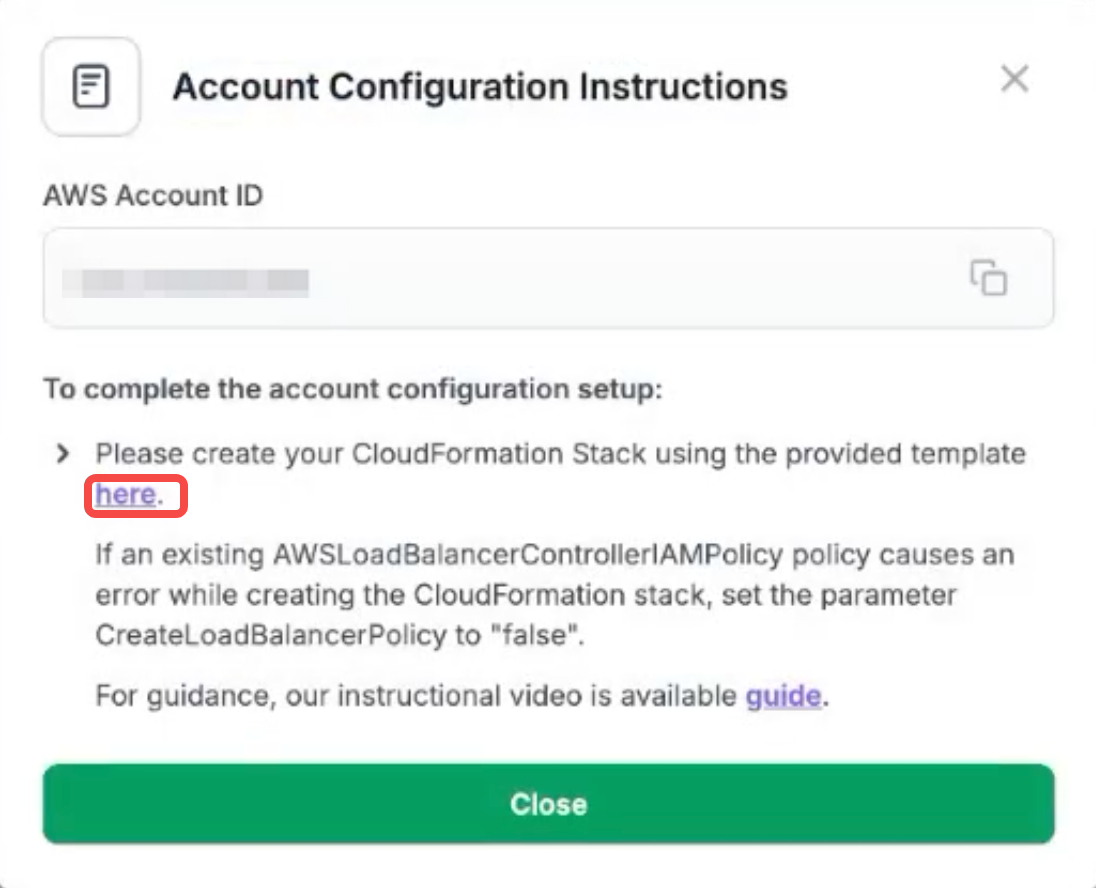
Click the question mark icon next to Deploying to open the Account Configuration Instructions window.
Click here to open AWS CloudFormation and create a stack. The stack grants the permissions Omnistrate needs to manage resources in your AWS account.
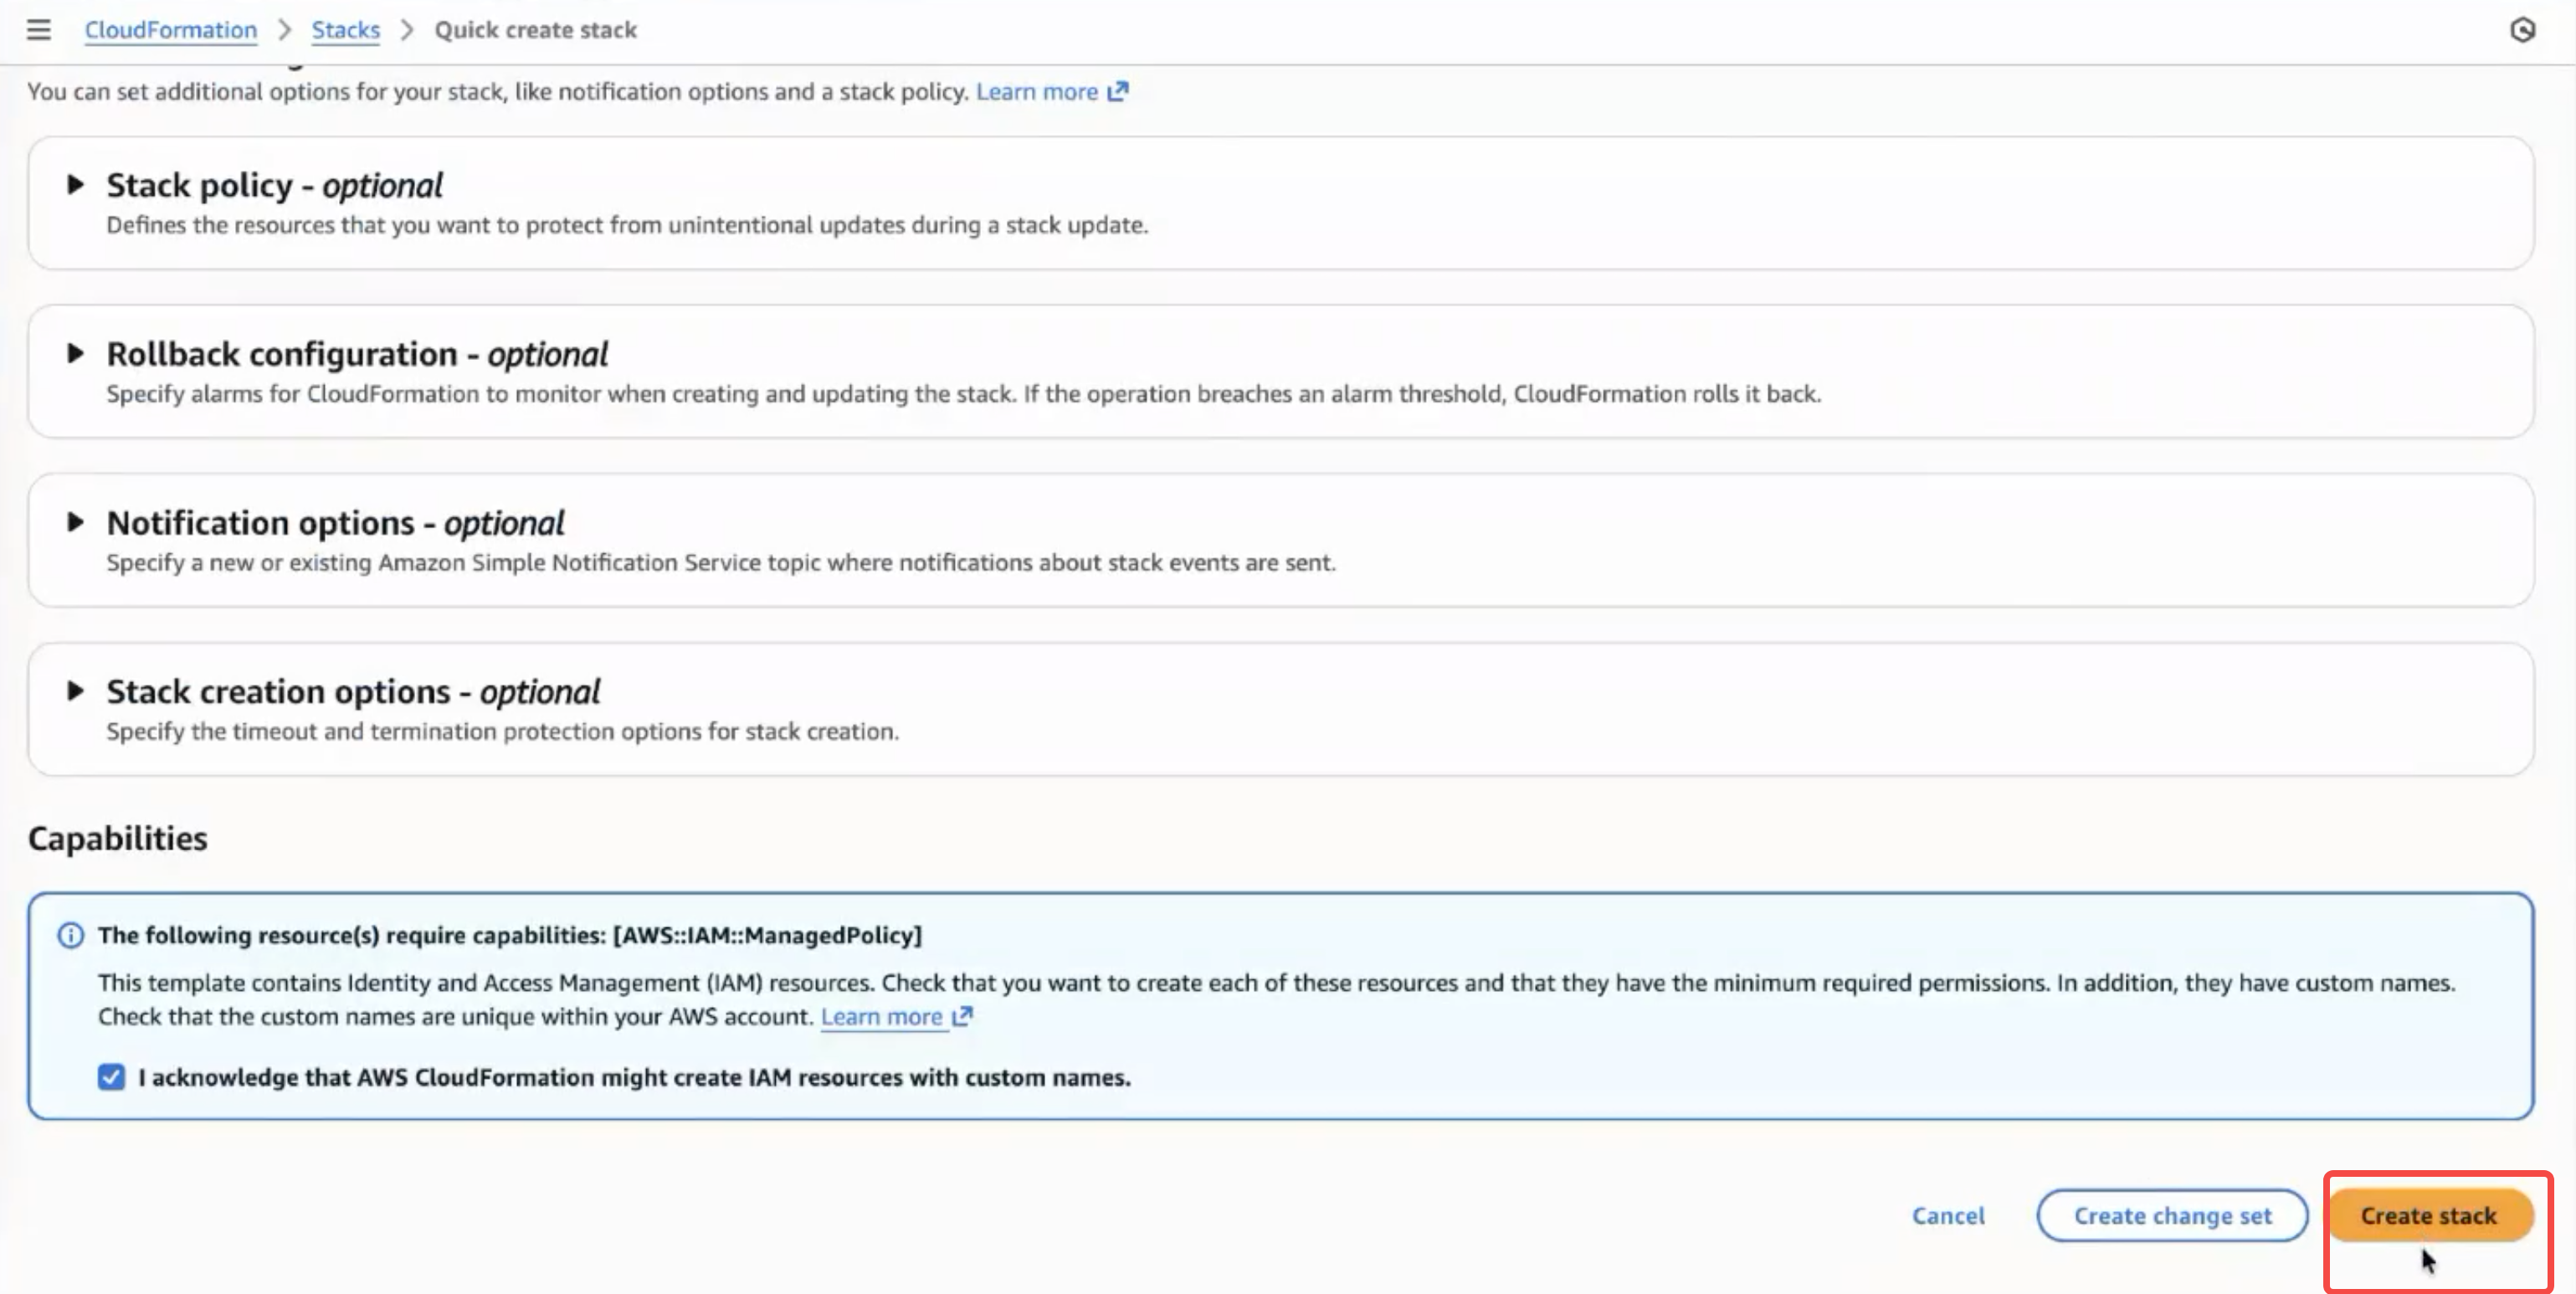
Wait for the stack creation to complete.
Step 4. Deploy an instance
Once the account is connected, deploy the SynxDB Cloud instance.
Configure the instance.
In the Customer Portal, navigate to Instances and click Create. The Create Deployment Instance page opens.
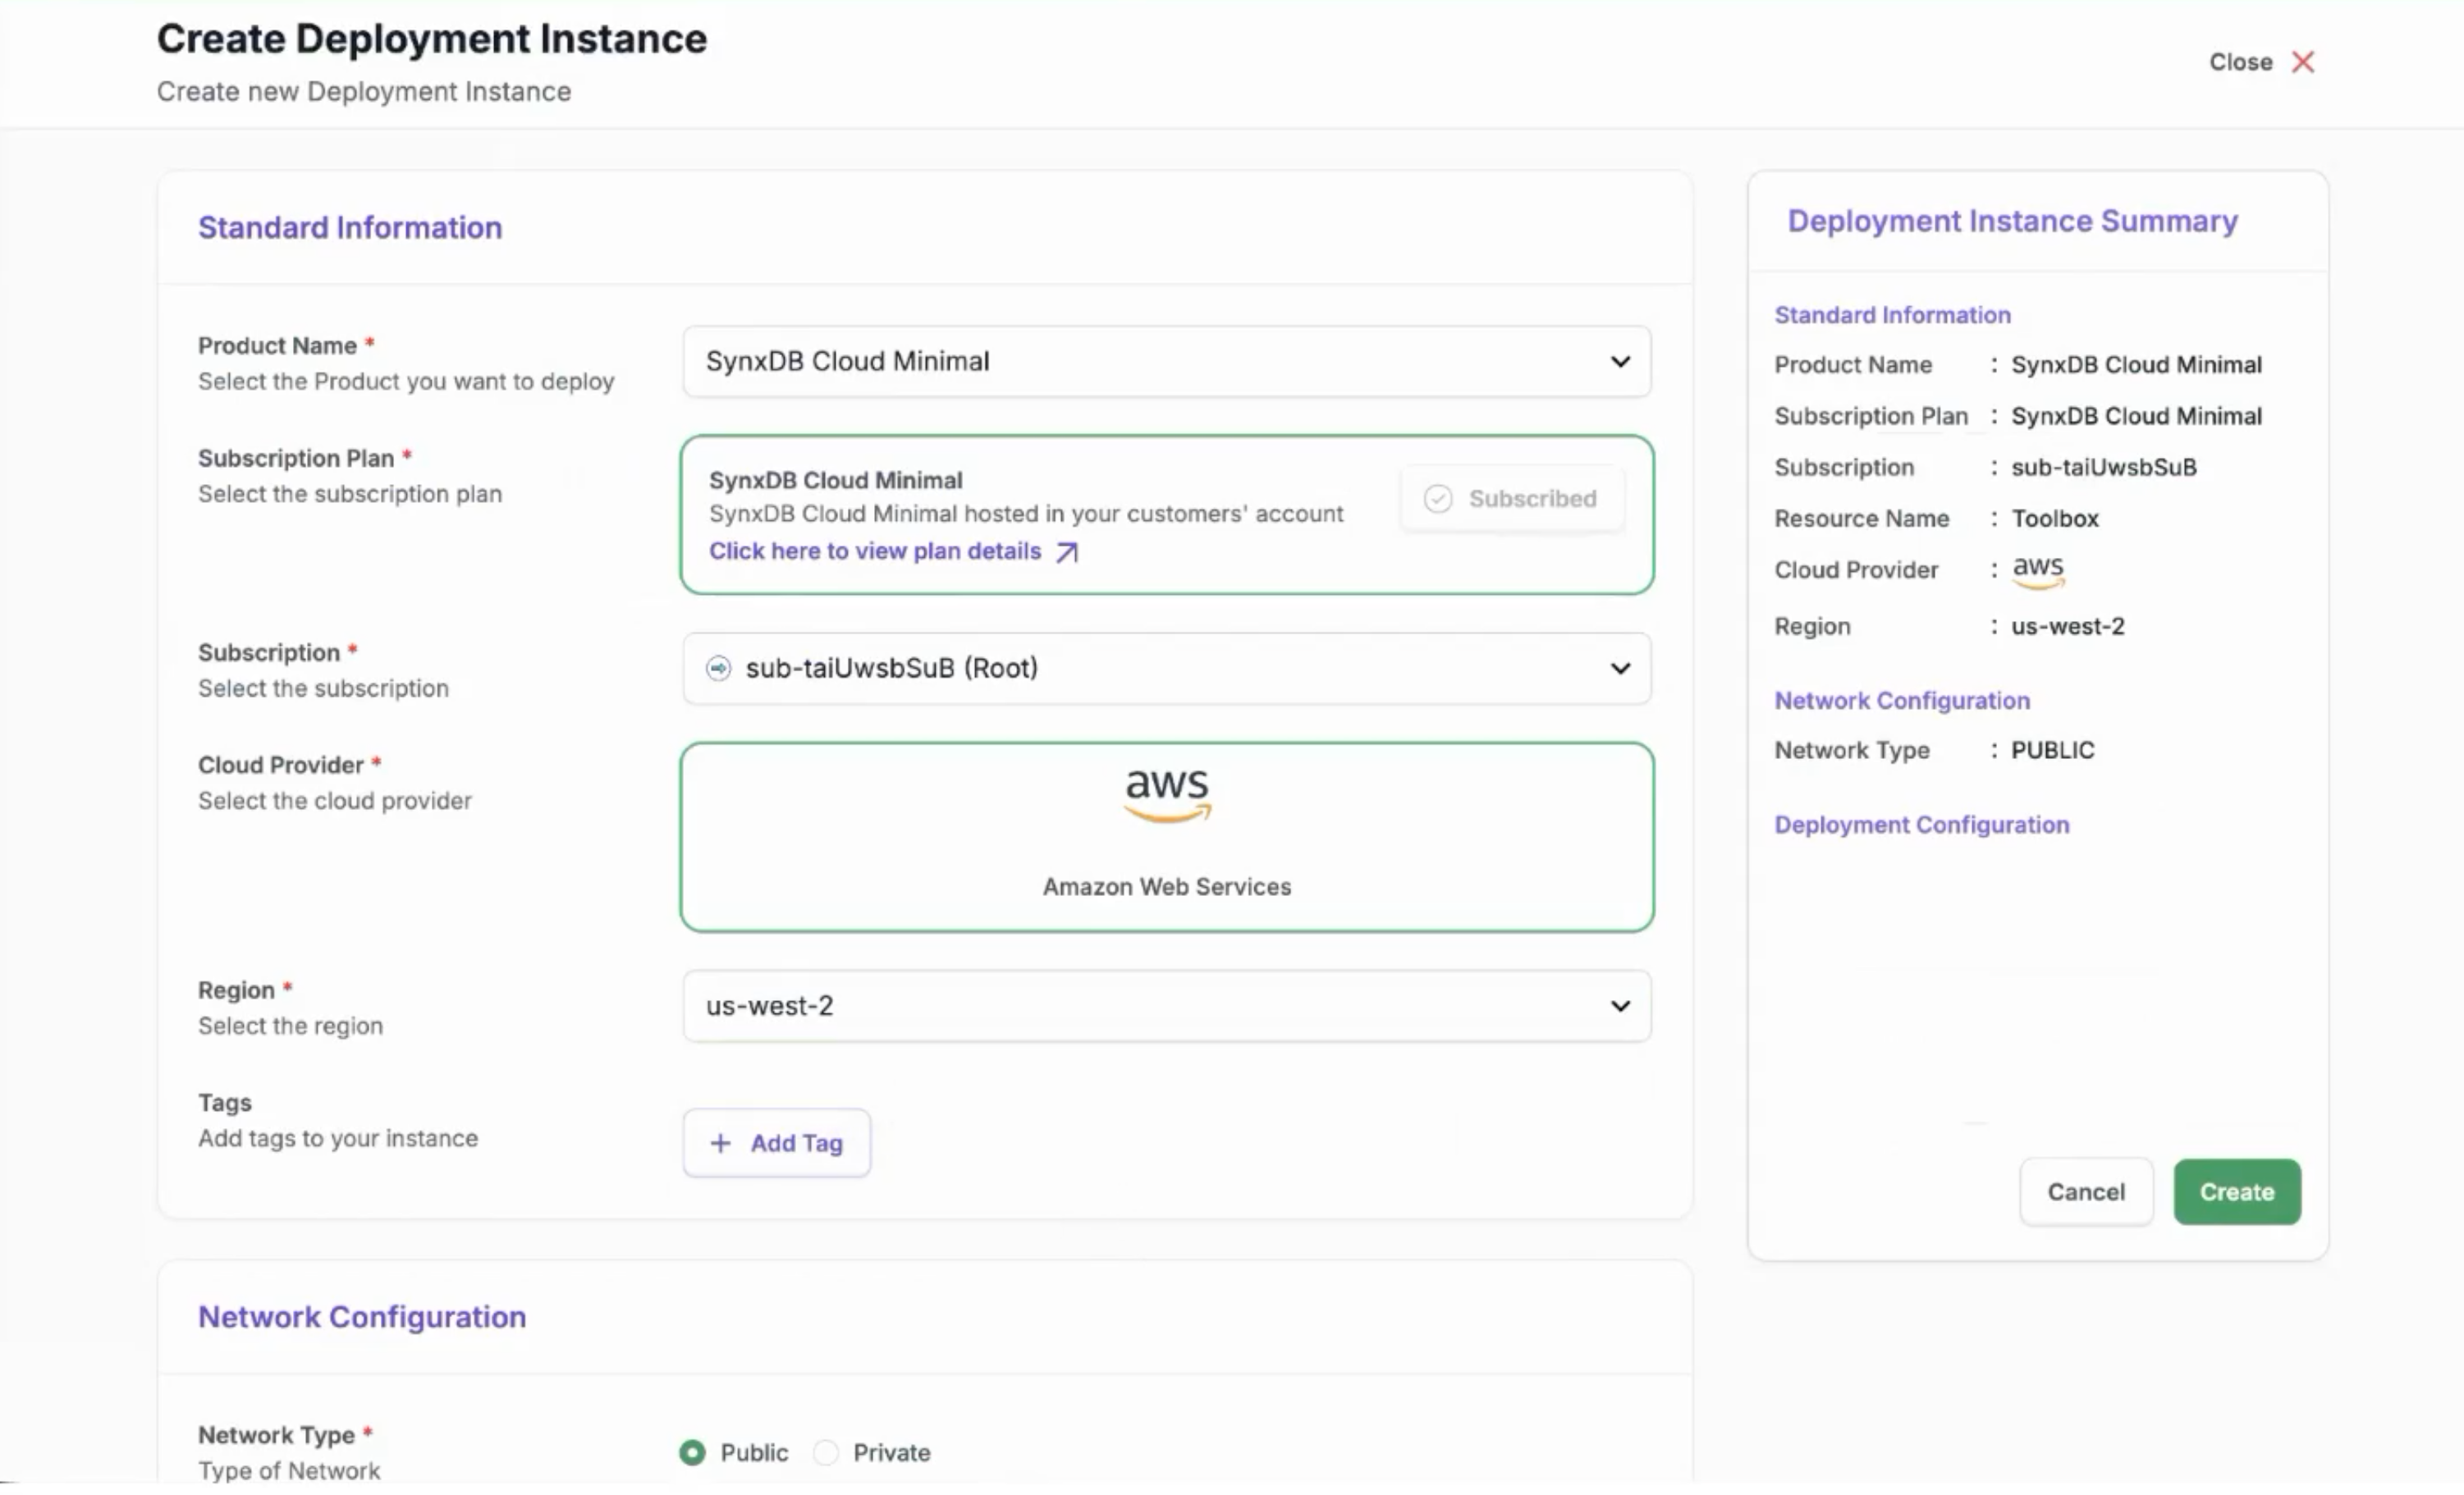
Product: Select SynxDB Cloud BYOC.
Cloud Provider: Select AWS.
Region: Select US West 2 (recommended).
Cloud Provider Account Config ID: Select the connected cloud provider account.
Start the deployment.
Click Create to start.
Wait for provisioning to complete. Omnistrate automatically provisions:
An EKS Cluster (first-time deployment takes approximately 20–30 minutes).
RDS Database (persistent storage).
S3 Buckets.
You can monitor progress in two places:
Customer Portal: Check the instance status.
AWS Console: Refresh the EKS, RDS, and S3 views to watch resources being created.
Note
If a dedicated RDS Postgres database is not configured, the system defaults to an internal non-persistent H2 database. This is suitable for testing only. For production use, ensure the RDS instance is correctly provisioned and connected.
Step 5. Retrieve the console URLs
Once the deployment is complete, contact the SynxDB Cloud support team to obtain the console URLs. The URLs are not yet displayed directly in the Customer Portal.
You receive two URLs:
DBaaS Admin Console (
/ops): Used by you to create and manage organizations, accounts, warehouses, and other deployment-level resources.DBaaS User Console (
/console): Used by your database users for daily data operations. Share this URL with them in Step 7.
Step 6. Create organizations and warehouses
Open the DBaaS Admin Console (/ops) URL in a browser and log in:
Username:
adminPassword:
admin
Note
Change the default credentials immediately after your first login.
Create the following resources in order: Organization → Account → UnionStore → Warehouse. When you create a UnionStore, the system automatically provisions EC2 instances based on the resource profile you select.
For detailed steps, see Manage Architectural Resource Units. For a full reference, see Manage Using DBaaS Admin Console.
Step 7. Hand off access to database users
Share the following with each database user:
The DBaaS User Console (
/console) URLInitial login credentials for the user’s account
The connection string (host, port, and database name) for the user’s UnionStore
Your database users can then connect from any SQL client or application using the connection string.
Note
For production environments, configure a valid TLS certificate before database users connect from external applications.